The slice shot is a technique used in tennis to create backspin on a ball. Slice shots can make life difficult on your opponent, in particular, if used intermittently with topspin. By slicing the ball from time to time you can throw off your opponent’s timing and make returning the ball more difficult.
In tennis, a slice shot is the opposite of a topspin shot. The ball spins backward as it travels through the air so that after bouncing, it stays low on the ground. If hit with a lot of backspin, the ball will reverse towards the net or away from your opponent. The motion of swing on a slice shot is high-to-low with a follow-through back up.
While not used as often as a topspin shot, the slice shot can be a very effective tool in throwing off your opponent’s timing. Slice shots can be performed either as a forehand slice shot or a backhand slice. It works well as a counter to heavy topspin baseliners.
Slice shots are also ideal when used as an approach shot, particularly if it’s to the backhand side. By slicing the ball before approaching the net, you buy yourself more time. In addition, the backspin on the ball will keep it from bouncing too much, making it more challenging for your opponent to hit a passing shot.
Slice shots are generally easier to learn and execute than topspin shots, however, you want to make sure you learn the proper technique. Here are the 10 steps you need to follow to properly execute a slice shot, starting with the correct grip.
1. Use a Continental Grip
The continental grip is ideal for slice shots on either the forehand or backhand side. The grip helps to naturally position the head of the racket at a slight upward angle as you perform the slice. This will open up the racket head to create that spin effect.
You don’t need a large amount of tilt of the racket to execute the shot, however, you do need to keep the racket face open a bit. As much as a 10 to 15-degree tilt can be enough to execute the shot as long as you swing high to low.
Adjust your grip with your non-hitting hand just before you initiate the shot. For more information on the continental grip as well as other grips, see the article on how to grip a tennis racket.
2. Start in the Ready Position
In order to be in a position to react quickly, start in a ready position with your racket held in front of you, weight forward on the balls of your feet, knees slightly bent. Hold the throat of the racket with your non-hitting hand.
Once you know which side the ball is coming to, start to turn your body towards that side. If you use a traditional closed or neutral stance, pivot your upper body around your back foot. If you use an open stance, pivot around your torso.
The advantage of the closed or neutral stance is that you will be able to run in a forward motion towards the ball to adjust if the shot is wide. This is usually faster than having to side-step to get to the ball.
However, on very wide shots where you don’t have enough time to set up, you may find yourself in a situation where you need to hit the ball with an open stance. This can work as long as you rotate your shoulders and hips to the side.
3. Turn Sideways Rotating Your Hips and Shoulders
As you turn to the side, rotate your hips and shoulders so that they are pointing towards the net. It’s important to turn as soon as possible. Doing so will allow you to adjust to the ball by stepping forward rather than having to sidestep.
As you do this, bring the racket back behind you. Be sure to position the head of the racket so that it is higher than the handle as you bring your racket back. The racket head should also be higher than the oncoming ball.
If you tend to wait until the ball gets closer to bring your racket back, it can throw your timing off. It’s best to turn quickly and position the racket back so that you have more time to execute the shot properly.
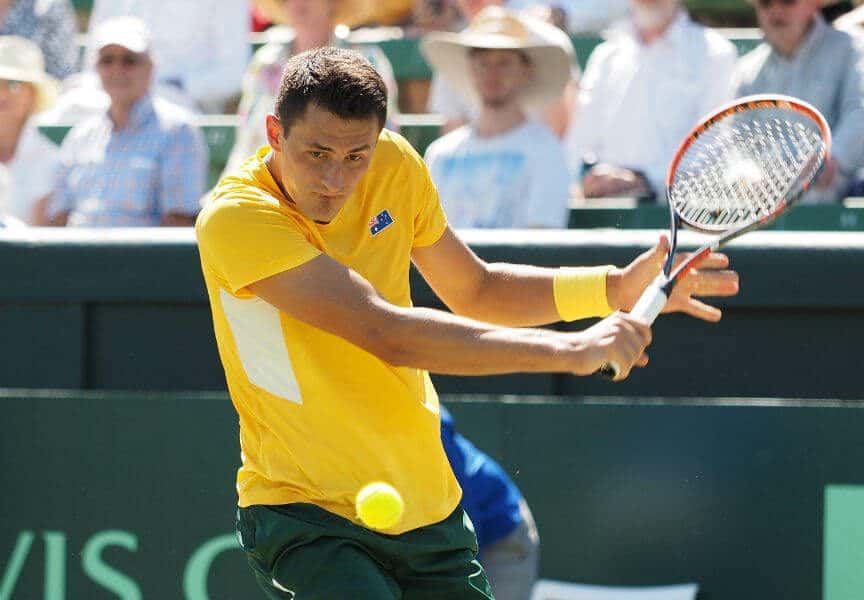
4. Backhand vs Forehand Slice Shots
The technique for the forehand and backhand slice shots is similar. In both cases, you want to use a one-handed swing to execute the shot, regardless of whether you typically hit your backhand or forehand as a two-handed stroke.
The main difference is the use of the non-hitting hand. For the forehand slice, your non-hitting arm will be extended in front of you to help you balance better and serve as a guide to the oncoming ball. On the backhand slice, you want to use your non-hitting hand to guide the racket back.
As you guide the racket back, hold the throat of the racket with your non-hitting hand. You don’t need to hold the frame tightly with your non-hitting hand, simply use your hand for support and as a guide.
As you begin your forward trajectory on the swing, remove your non-hitting hand from the throat of the racket. This is another reason you don’t want to grip the frame too tightly. It will allow you to release the racket more easily.
If you also use your non-hitting hand to guide the racket back on your forehand topspin shots, do the same with the slice. This will disguise your shot a bit longer so that your opponent doesn’t have as much time to react.
5. Lead with the Bottom Edge of Your Racket
As you begin your swing forward, lead with the bottom edge of your racket. This combined with the high-to-low trajectory of the swing will help generate the backward spin you are looking for when performing the stroke.
Leading with the bottom edge of the racket will ensure that you maintain a downward trajectory of swing and will position the racket so that it’s tilted up at a slight angle. This is necessary to create backspin on the ball.
It doesn’t have to be a significant angle. As little as 10 to 15 degrees of tilt can be enough to execute the shot. As long as you swing high to low, you can create the necessary backspin on the ball.
6. Swing Hight-to-Low and Across Through Contact
Continue the forward motion in a downward trajectory. Keeping your arm extended out with a slight bend in the elbow, shift your weight forward. Your shoulder should guide you. This is one shot where the use of your shoulder can really aid you as you swing through.
The high-to-low motion of swing should feel like you are sliding the racket towards the ball. Avoid chopping down on the ball as this will cause the ball to float across the net and force you to have to stop abruptly on the stroke.
Instead, you want to make sure you follow through inside-out and forward following contact. When making contact, you want to strike somewhere between the face of the ball and the bottom of the ball.
7. Follow Through Back Up on the Finish
While the motion is low-to-high through contact, the finish is both forward and back up again in a swooping motion. The motion should feel natural and be continuous. Swing through fully after contact.
Make sure you don’t stop after contact as it will decrease the effect of the backspin and float the ball across the net. Instead, continue the momentum of swing. Just remember that after contact you want to adjust the swing forward and slightly back up again.
If you fail to follow through on the ball, it will probably land short. This is exactly what you want to avoid since you will likely be setting up an approach shot. If you don’t hit your slice shot deep, you make it easier for your opponent to return the ball.
8. Maintain Good Eye Contact with the Ball

Throughout the stroke, be sure to maintain good eye contact. You want to stay focused on the ball from the time your opponent makes contact to the time you initiate the full follow-through keeping your eye on the ball will help you make better contact with the center of the racket head. This is critical to hitting a good slice shot.
Keep your head down and don’t look up at your opponent until you’ve made contact with the ball and followed through. Looking up at your opponent too soon will likely cause you to mishit the ball. At best, it will only serve to distract you.
9. Shift Your Weight to Your Front Foot
Another important aspect of the stroke is footwork. Your positioning will be similar to when hitting a forehand or backhand stroke. Your back foot will be roughly parallel to the net and your front foot will be pointing either to the right post or the left post depending on whether you are performing a forehand or backhand slice.
To turn to the side, you want to pivot with your back foot. Your weight will also be on your back foot to initiate the stroke. As you initiate the swing your weight should shift to your front foot. During contact with the ball, your weight will be on your front foot.
If you use an open stance, you will not pivot around your back foot, but you should still transfer your weight from the foot on your hitting side to the foot on the non-hitting side. For a right-handed player, from the right foot to your left foot.
10. Finish by Returning to the Ready Position
After you complete the follow through, your body will naturally shift forward and you will step up with your back foot. At this point, you can do a split step and set up again in the starting position to anticipate your next shot.
If you are located too far to either side of the court or too far forward, you will also want to adjust by sidestepping or backstepping so that you are better positioned on the court. Once in the ready position, you will be in position to respond to your opponent’s next move.
Better yet, if you have the opportunity to approach the net, this is a good time to do so. As long as you’ve placed the ball deep in your opponent’s court, you will have more time to move up. At the same time, the low bounce will make it more difficult for your opponent to pass you with a topspin shot.
11. Know When to Use the Slice Shot
The slice shot can be an effective stroke for changing the pace of a rally or for throwing off your opponent’s rhythm. It can also be used on very wide shots to allow you more time to recover and, in turn, make the ball more difficult for your opponent to return.
It’s also the ideal shot to use on an approach shot. Slice the ball deep into your opponent’s side of the court, and move in for the attack at the net. Because backspin will tend to make the ball float a bit longer, it buys you more time to move up.
However, make sure you execute the shot when your opponent is far back, beyond the baseline. If your opponent is up at the net or initiating a move up to the net, avoid the shot. It will tend to float, making it easy for your opponent to put the shot away.
The only time you may want to use the slice when your opponent is up at the net is if they force you up to the net with a drop shot. At this point, it’s the only resort you have since you’ll likely need to stretch out to make the shot. It’s unlikely you’ll be able to use topspin in this instance.
Final Notes
Because of the large amounts of spin imparted on the ball, a slice can throw off your opponent as the ball will tend to stay low and bounce back toward the net if executed correctly. This is a shot you want to keep in your arsenal as a way to keep your opponent honest.
Practicing the slice shot should be easy. You can throw in a few slices while hitting against a partner, or you can even use them intermittently during a friendly match. If playing competitively, of course, you will want to have the shot down before making use of it.
The slice shot is the tennis equivalent of throwing a slider in baseball. You don’t want to use it too much, but if thrown in from time to time it can be very effective. If you like to approach the net a lot, make use of the slice on your approach shots. Just be sure to hit them deep.
Share this Post